Filebeat on k8s 日志采集实战操作
一、概述
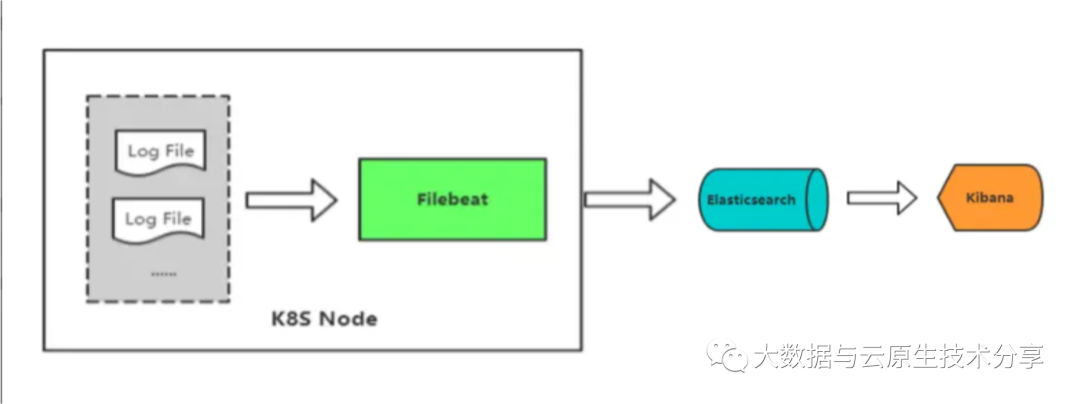
Filebeat 是一个轻量级的开源日志文件和数据收集器,由 Elastic 公司开发,用于采集、解析和发送日志数据。在 Kubernetes 中,Filebeat通常用于采集容器日志,并将其发送到中央日志存储、分析或搜索工具,如 Elasticsearch、Logstash 或 Fluentd。
以下是 Filebeat 在 Kubernetes 中日志采集的工作原理:
- Filebeat 容器部署:首先,在 Kubernetes 集群中创建一个或多个 Filebeat 容器的 Pod。这些 Pod 可以位于同一节点上,也可以分布在多个节点上,具体取决于您的部署方式和需求。
- Filebeat 配置文件:每个 Filebeat 容器需要一个配置文件,该文件定义了 Filebeat 要监视的日志源、采集策略、日志过滤规则和目标输出等。配置文件通常以 YAML 格式定义。
- Kubernetes ConfigMap:Filebeat 配置文件通常存储在 Kubernetes ConfigMap 中。ConfigMap 是 Kubernetes 中的资源,用于存储配置数据,以便它可以被多个容器访问。Filebeat 容器将挂载包含配置文件的 ConfigMap,并将其用作配置源。
- Filebeat 启动:Filebeat 容器启动后,它会读取配置文件并按照配置定义的规则开始采集日志。这包括监视容器的日志文件、容器日志目录或其他数据源。
- 日志采集和解析:Filebeat 会定期扫描配置的日志源,并将新的日志行采集到内部队列中。它还可以对采集的日志进行解析,以提取有用的信息,如时间戳、日志级别、标签等。Filebeat 可以根据您的配置对日志数据进行结构化处理。
- 输出到目标:Filebeat 会将采集的日志数据发送到指定的输出目标,通常是中央日志存储、分析或搜索工具。常见的输出目标包括 Elasticsearch、Logstash、Kafka 或各种云日志服务。
- 数据传输和处理:输出目标将接收到的日志数据进行存储、处理、分析或可视化。这通常涉及到对数据的索引、搜索、过滤和可视化,以便用户可以查询和分析日志数据。
Filebeat 提供了丰富的配置选项,可以根据您的需求对日志数据进行高度定制和筛选。它还支持自动发现新容器、节点和服务,并动态调整采集策略。这使得它成为 Kubernetes 环境中日志采集的有力工具。
总的来说,Filebeat 的工作原理是不断监视和采集容器生成的日志,然后将这些日志数据发送到中央处理工具,以便分析和可视化。这有助于集中管理和分析容器日志,以便更好地了解应用程序的状态和性能。
 Filebeat 官方文档:https://www.elastic.co/guide/en/beats/filebeat/current/filebeat-overview.html
以前也写过关于 filebeat 更详细的介绍和实战操作的文章,只不过 filebeat 不是部署在 k8s 上,感兴趣的小伙伴可以先查阅我之前的文章:
- 轻量级的日志采集组件 Filebeat 讲解与实战操作
- Filebeat 采集 k8s Pod 和 Events 日志实战操作
二、K8s 集群部署
k8s 环境安装之前写过很多文档,可以参考我以下几篇文章:
- 【云原生】k8s 离线部署讲解和实战操作
- 【云原生】k8s 环境快速部署(一小时以内部署完)
三、ElasticSearch 和 kibana 环境部署
这里可以选择以下部署方式:
- 通过docker-compose部署:通过 docker-compose 快速部署 Elasticsearch 和 Kibana 保姆级教程
- on k8s 部署:ElasticSearch+Kibana on K8s 讲解与实战操作(版本7.17.3)
这里我选择 docker-compose 部署方式。
1)部署 docker
# 安装yum-config-manager配置工具
yum -y install yum-utils

# 建议使用阿里云yum源:(推荐)
#yum-config-manager --add-repo https://download.docker.com/linux/centos/docker-ce.repo
yum-config-manager --add-repo http://mirrors.aliyun.com/docker-ce/linux/centos/docker-ce.repo

# 安装docker-ce版本
yum install -y docker-ce
# 启动并开机启动
systemctl enable --now docker
docker --version
2)部署 docker-compose
curl -SL https://github.com/docker/compose/releases/download/v2.16.0/docker-compose-linux-x86_64 -o /usr/local/bin/docker-compose

chmod +x /usr/local/bin/docker-compose
docker-compose --version
3)创建网络
# 创建
docker network create bigdata

# 查看
docker network ls
4)修改 Linux 句柄数和最大线程数
#查看当前最大句柄数
sysctl -a | grep vm.max_map_count
#修改句柄数
vi /etc/sysctl.conf
vm.max_map_count=262144

#临时生效,修改后需要重启才能生效,不想重启可以设置临时生效
sysctl -w vm.max_map_count=262144

#修改后需要重新登录生效
vi /etc/security/limits.conf

# 添加以下内容
* soft nofile 65535
* hard nofile 65535
* soft nproc 4096
* hard nproc 4096

# 重启服务,-h 立刻重启,默认间隔一段时间才会开始重启
reboot -h now
5)下载部署包开始部署
# 这里选择 docker-compose 部署方式
git clone https://gitee.com/hadoop-bigdata/docker-compose-es-kibana.git

cd docker-compose-es-kibana

chmod -R 777 es kibana

docker-compose -f docker-compose.yaml up -d

docker-compose ps
四、Filebeat on k8s 部署(daemonset)
部署包下载地址:https://artifacthub.io/packages/helm/elastic/filebeat
1)安装 helm
# 下载包
wget https://get.helm.sh/helm-v3.9.4-linux-amd64.tar.gz
# 解压压缩包
tar -xf helm-v3.9.4-linux-amd64.tar.gz
# 制作软连接
cp ./linux-amd64/helm /usr/local/bin/helm
# 验证
helm version
helm help
2)下载部署包进行安装
1、下载安装包
helm repo add elastic https://helm.elastic.co

helm pull elastic/filebeat --version 7.17.3

tar -xf filebeat-7.17.3.tgz
2、修改配置
# 修改配置 filebeat/values.yaml,主要把 ELasticsearch 地址更换
vi filebeat/values.yaml

# 主要修改filebeat配置
  filebeatConfig:
    filebeat.yml: |
      filebeat.inputs:
      - type: container
        paths:
          - /var/log/containers/*.log
        fields:
          index: k8s-pod-log
        processors:
        - add_kubernetes_metadata:
            host: ${NODE_NAME}
            matchers:
            - logs_path:
                logs_path: "/var/log/containers/"

      output.elasticsearch:
        host: '${NODE_NAME}'
        hosts: '192.168.182.110:9200'
        index: "filebeat-%{[fields][index]}-%{+yyyy.MM.dd}"

      setup.template.name: "default@template"
      setup.template.pattern: "filebeat-k8s-*"
      setup.ilm.enabled: false
3、开始安装 filebeat
helm install filebeat ./filebeat -n logging --create-namespace

kubectl get pods -n logging
3)检查数据是否正常采集到 ES
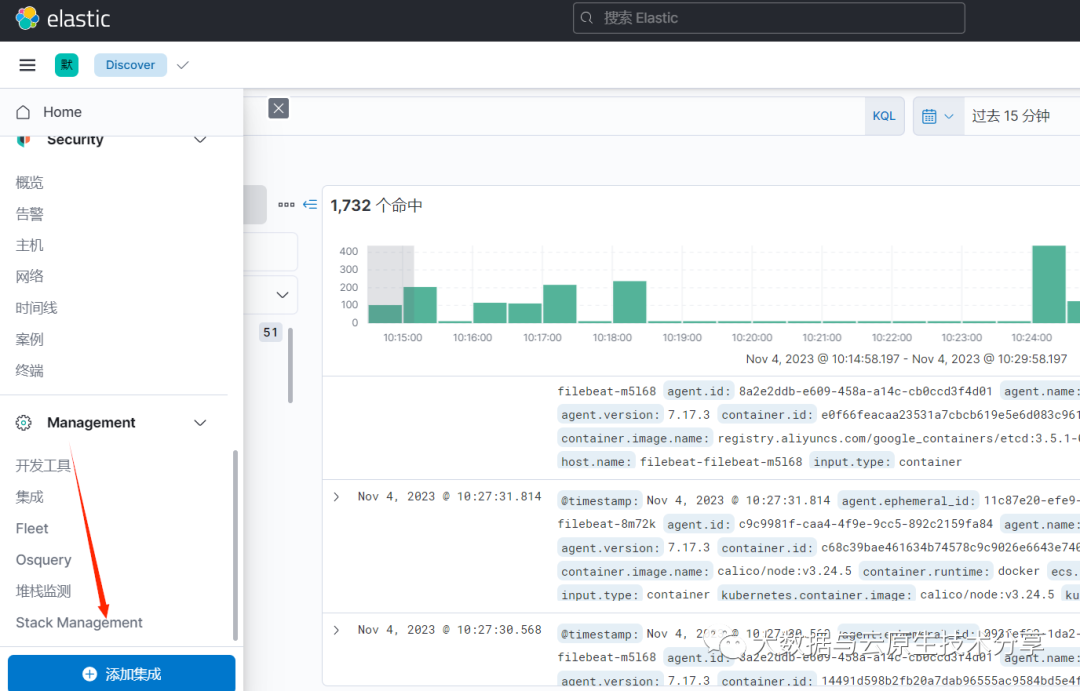
访问 kibana:http://ip:5601/
1、Stack Management
 图片
图片
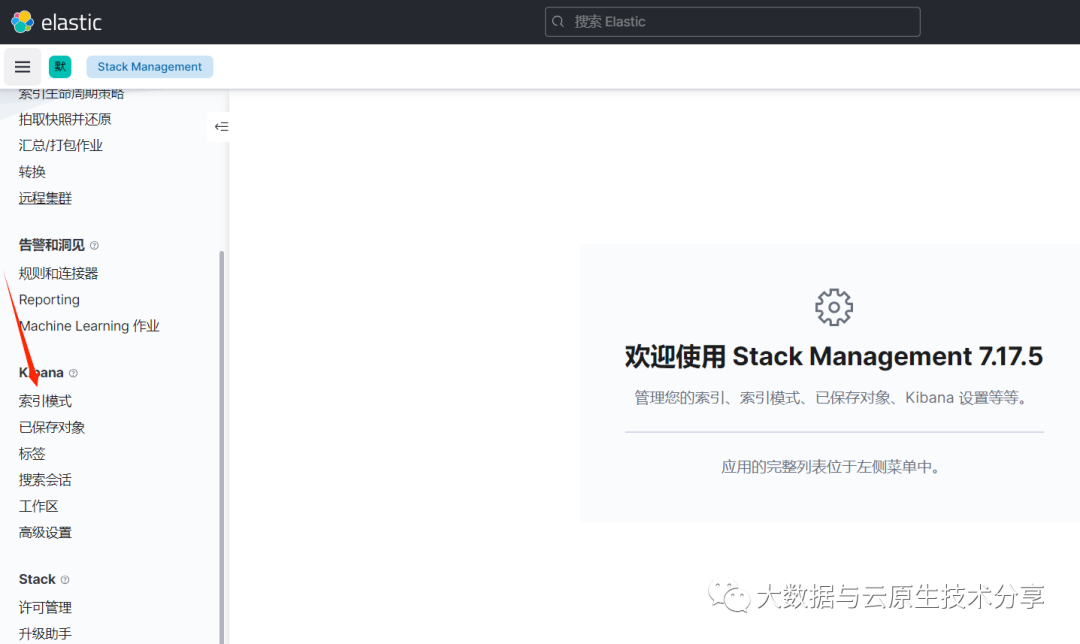
2、索引模式
 图片
图片
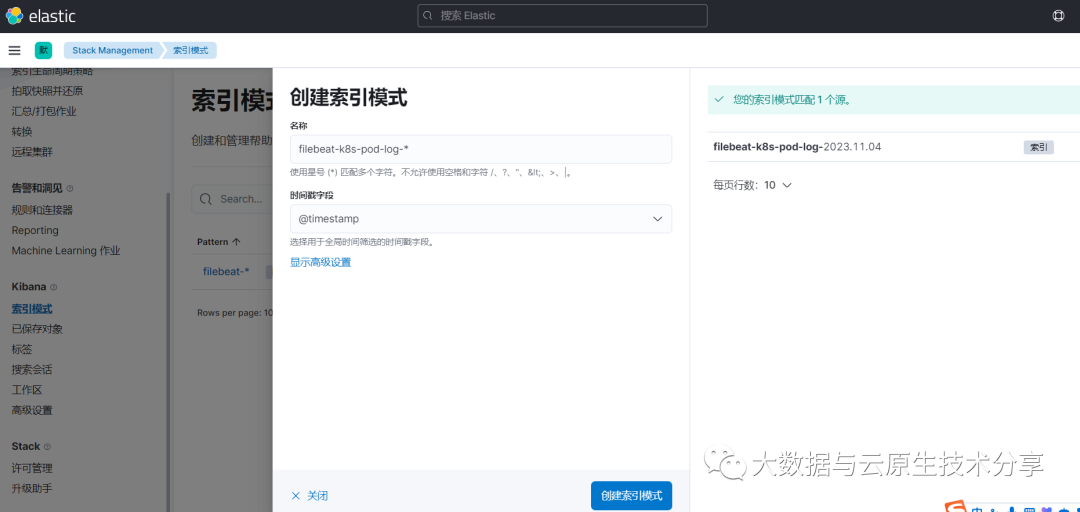
3、开始创建索引模式
 图片
图片
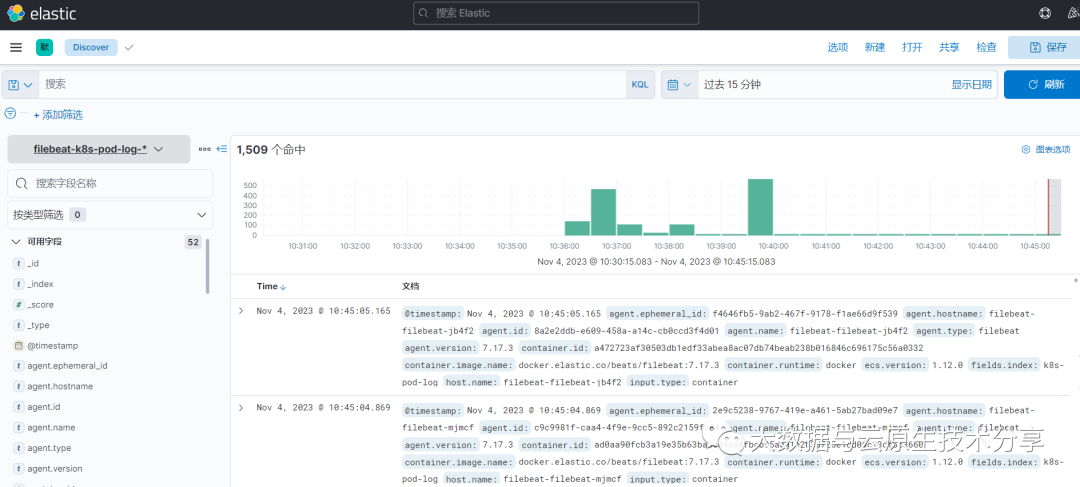
4、Discover 查询数据
 图片
图片
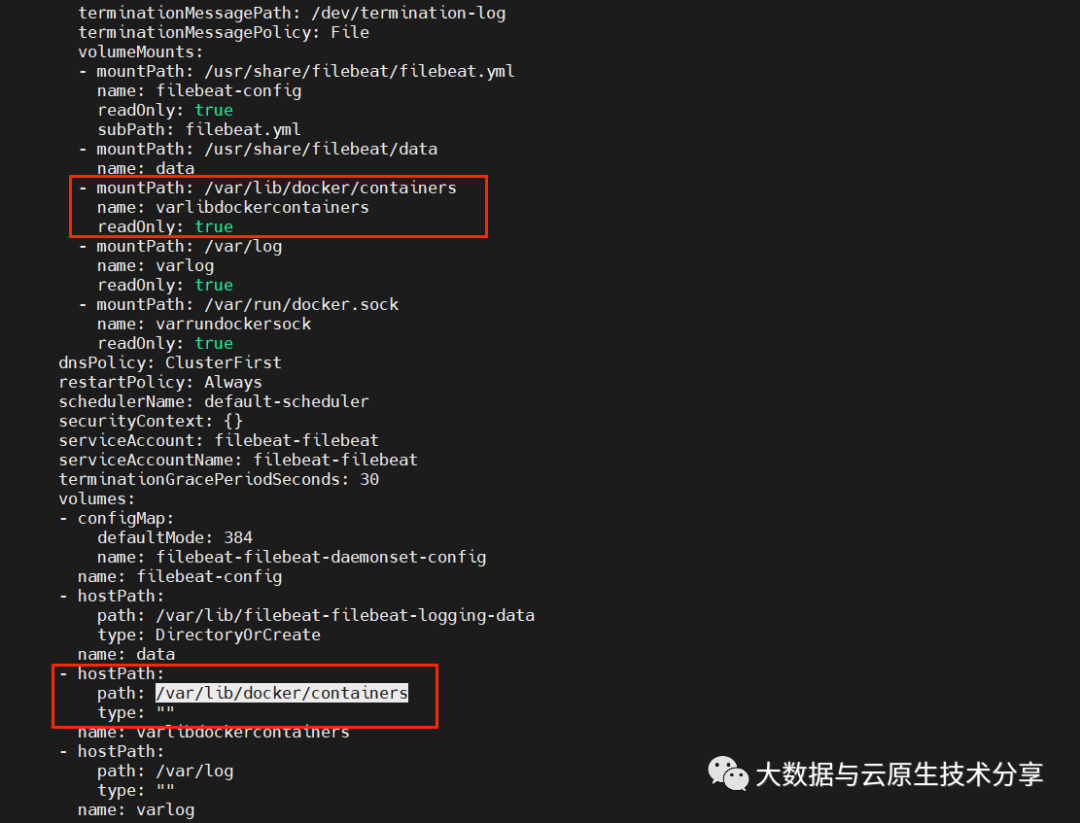
其实采集原理是非常简单的,就是通过挂载宿主机的容器日志目录 /var/lib/docker/containers 到容器的 /var/lib/docker/containers。
 图片
图片
但是通过这种挂载宿主机容器目录有个弊端,就是只能采集 pod 标准输出的日志,其它日志是收集不到的,下篇文章将介绍另外两种方式采集来解决这个问题。